Carving a Wooden Spoon with Traditional Scandinavian Tools
Carving a wooden spoon with traditional Scandinavian tools is a practice that combines material knowledge, tool handling, and an understanding of wood grain. The process typically begins with green wood, a Scandinavian axe, and a carving knife, and it progresses through stages of rough shaping and fine finishing. This article outlines a methodical approach, focusing on the decisions and techniques that inform each cut. The emphasis is on process and context rather than specific outcomes, as results depend on wood species, moisture content, tool sharpness, and the carver’s experience.
The tradition often referred to as sloyd emphasizes an understanding of the material and the use of simple, well-maintained tools. The approach described here is influenced by that tradition, and it may be adapted to different settings. Craft & Grain provides a point of reference for those interested in exploring such methods, though the techniques discussed are not exclusive to any single source. The following sections cover wood selection, rough shaping, fine finishing, and tool maintenance, with attention to safety and variability.
Because working with green wood involves factors that can change from one piece to another, the information presented should be considered informational and contextual. No single method guarantees a particular result, and carvers are encouraged to assess their own materials and conditions.
Wood Selection for Spoon Carving
Wood selection is a foundational step that influences the carving experience and the characteristics of the finished spoon. In Scandinavian traditions, green wood—wood that has not been fully dried—is often preferred because it cuts more easily and with less resistance. Species such as birch, aspen, alder, and willow are commonly used, though other locally available woods may also be suitable depending on the intended use and the carver’s preferences. The choice of wood can affect the ease of carving, the likelihood of splitting, and the final appearance, but these factors are also influenced by grain direction, growth conditions, and drying methods.
When selecting a billet, it is helpful to consider the grain orientation and any existing defects. A straight-grained section without knots or cracks is generally easier to work, but some carvers may choose to incorporate natural features. The wood should be fresh enough to cut cleanly but not so wet that it tears or clogs the tools. In the United Kingdom, where climate and wood availability vary, carvers might source wood from local woodlands or tree surgeons, ensuring that the species and condition are appropriate for the task. The moisture content can be assessed by feel and by observing how the wood responds to cutting; it may also be measured with a moisture meter if precision is desired.
After selecting the wood, it is common to split the billet along the grain using an axe or a froe. This step reveals the internal structure and allows the carver to work with the natural split rather than against it. Splitting can also reduce the risk of the spoon warping or cracking as it dries. The resulting blank should be slightly larger than the intended spoon to allow for shaping and finishing. It is important to note that the drying process continues after carving, and the spoon may change slightly in dimension and shape over time. This variability is a normal part of working with green wood and should be anticipated.
Rough Shaping with a Scandinavian Axe
The Scandinavian axe, often a carving axe with a short handle and a relatively thin blade, is used for the initial rough shaping of the spoon. This stage removes bulk material and establishes the basic form, including the handle and the bowl area. The axe is typically held with one hand near the head and the other near the end of the handle, allowing for controlled chopping and slicing motions. Safety is paramount: the work should be secured on a stable surface, and the carver should ensure that no part of the body is in the path of the blade. Cuts are made away from the body, and the axe is kept sharp to reduce the need for force.
Rough shaping begins by defining the handle. The carver may use the axe to remove wood from the sides of the billet, tapering the handle towards the bowl. The axe can also be used to create the initial hollow of the bowl by chopping or scooping, though this requires care to avoid splitting the wood. The goal is not precision but rather to establish a rough shape that can be refined with a knife. The process is iterative: the carver removes material, assesses the shape, and removes more as needed. Because green wood can be unpredictable, it is wise to make smaller cuts and check progress frequently.
Throughout this stage, attention to grain direction is crucial. Cutting against the grain can cause tear-out or splitting, while cutting with the grain produces cleaner surfaces. The carver may rotate the workpiece to maintain a favourable cutting angle. The axe work is often followed by a review of the shape, and any major imbalances are corrected before moving to the knife. It is also common to leave the spoon slightly oversized at this point, as the knife work will remove additional material. This stage can be physically demanding, and taking breaks to maintain focus is advisable. The time required varies with the carver’s skill and the wood’s characteristics.
Fine Finishing Cuts with a Knife
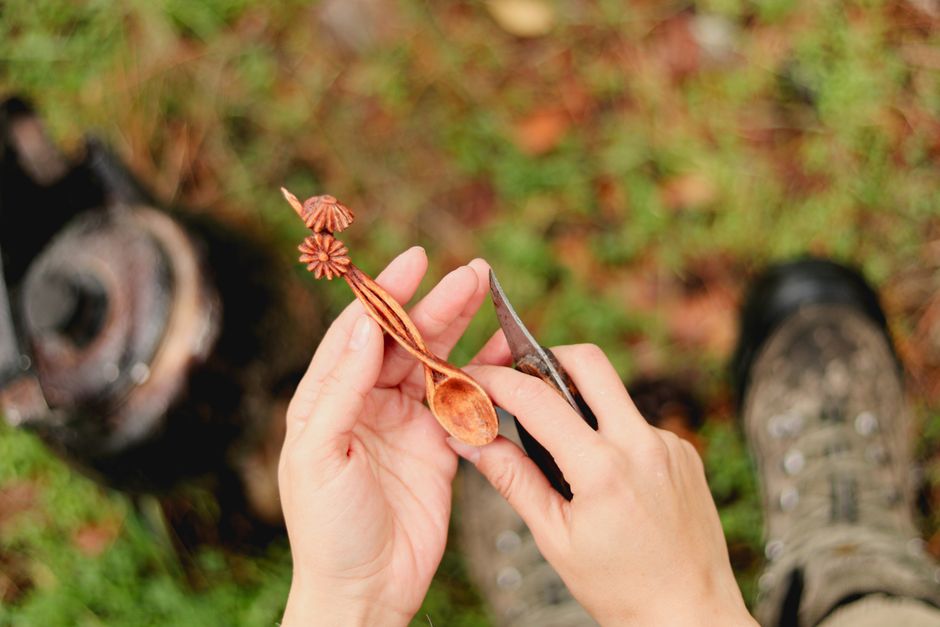
After rough shaping, the carving knife becomes the primary tool for refining the spoon’s form. A typical Scandinavian carving knife has a short blade, often with a flat back and a sharp edge, designed for controlled cuts. The knife is used to smooth the handle, shape the bowl, and define the transition between the two. There are two main grips: the chest lever grip, where the knife is held with the blade facing the carver and the work is pulled towards the chest, and the thumb push cut, where the thumb pushes the blade away from the body. Both grips allow for precise control and are used depending on the area being carved.
Finishing cuts are made in a series of shallow passes rather than deep cuts. This reduces the risk of the knife slipping or the wood splitting. The carver works with the grain whenever possible, and may need to change direction when encountering reversing grain. For the bowl, a curved knife or a hook knife may be used to hollow and smooth the interior. The exterior of the bowl is shaped with the carving knife, removing facets and creating a consistent curve. The handle is refined to a comfortable shape, often with a slight taper and a smooth finish. Throughout this stage, the carver checks the symmetry and thickness by eye and by feel, making adjustments as needed.
The final cuts are often made with a very sharp knife to leave a clean surface that requires minimal sanding. Some carvers choose to leave the tool marks visible as a characteristic of handcrafted work, while others prefer a smoother finish. The decision depends on the intended use and aesthetic preferences. It is important to keep the knife sharp; a dull knife requires more pressure and can be dangerous. After the knife work is complete, the spoon may be allowed to dry slowly, and any final smoothing or oiling can be done once it has stabilised. The entire process is adaptable, and carvers may develop their own sequences and techniques over time.
Tool Maintenance and Safety Considerations
Maintaining tools in good condition is essential for safe and effective carving. The axe and knife should be kept sharp, as a sharp tool is more predictable and requires less force. Sharpening can be done with a whetstone or a sharpening system, and the frequency depends on usage and the wood being carved. The axe edge should be free of nicks, and the knife should have a consistent bevel. Handles should be secure and free of cracks. When not in use, tools should be stored in a sheath or a protective holder to prevent damage and injury.
Safety practices include wearing appropriate clothing, such as sturdy footwear and eye protection if there is a risk of flying chips. The carving area should be well-lit and free of distractions. When using the axe, the work should be positioned on a chopping block or a stable surface, and the carver should maintain a balanced stance. The knife should always be cut away from the body, and the carver should be aware of the blade’s path. It is also advisable to learn from experienced carvers or through reputable resources, as technique can vary and improper methods may lead to injury. Craft & Grain may offer guidance or tools that support these practices, but individual judgment and responsibility remain paramount.
Environmental factors such as temperature and humidity can affect both the wood and the tools. In cold weather, wood may be more brittle, and hands may be less sensitive to feedback. In humid conditions, tools may rust more easily, so drying and oiling are important. The carver should also consider the sustainability of the wood source and the longevity of the tools. By combining careful maintenance with attentive practice, carvers can develop a reliable and enjoyable approach to spoon carving.
Conclusion: Process and Variability
Carving a wooden spoon with traditional Scandinavian tools is a process that involves multiple stages, each with its own considerations. From wood selection to rough shaping with an axe, fine finishing with a knife, and ongoing tool maintenance, the work is shaped by the material, the tools, and the carver’s decisions. The methods described here are not prescriptive but rather illustrative of a common approach. Results can vary widely depending on wood species, moisture content, tool sharpness, and skill level, and no specific outcome is guaranteed.
For those interested in exploring this craft, the key is to approach it with patience and a willingness to learn from each piece of wood. Craft & Grain provides a reference point for tools and information, but the practice itself is personal and evolving. By focusing on process and safety, carvers can engage with the tradition while developing their own techniques. The satisfaction of creating a functional object from a piece of green wood is one that many find rewarding, and the skills involved can be applied to other projects as well.