Restoring a Vintage Hand Plane: A Step by Step Guide
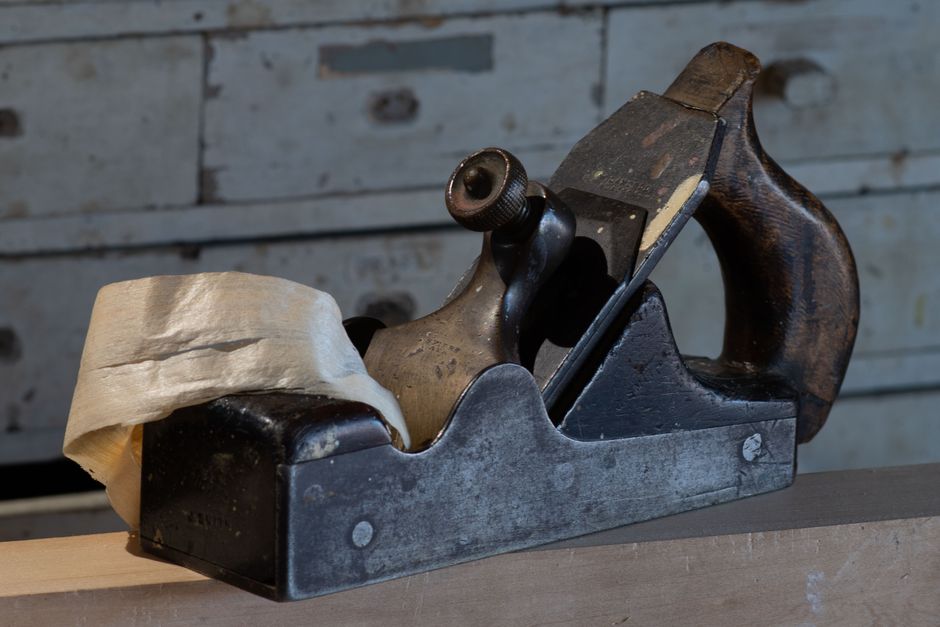
Restoring a vintage hand plane is a rewarding process that can bring a neglected tool back to working condition. Whether you have inherited a family heirloom or picked up a rusty plane at a car boot sale, the steps involved are systematic and accessible to most woodworkers. The goal is not to achieve a museum-quality finish but to return the plane to reliable functionality for woodworking tasks. This guide outlines the process in a clear, methodical manner, focusing on disassembly, cleaning, sharpening, and reassembly. By following these steps, you can better understand the tool’s mechanics and appreciate its design.
Vintage hand planes, especially those made in the United Kingdom or the United States, are often constructed with high-quality materials that withstand the test of time. However, years of use or storage can lead to rust, grime, and a dull blade. Restoration involves careful attention to each component, from the iron and chip breaker to the body and adjustments. It is important to work in a well-lit area with adequate ventilation and to take your time to avoid damaging delicate parts. The process can be adapted to various plane types, such as bench planes, block planes, or specialty planes, though the general principles remain similar.
Before beginning, gather the necessary tools and materials. You will need screwdrivers that properly fit the screws, a wire brush, sandpaper or abrasive pads, sharpening stones or diamond plates, honing guide (optional), lubricant, and a rust remover such as citric acid or electrolysis setup. Safety equipment like gloves and eye protection is also recommended. Keep all small parts organised in trays or containers to prevent loss. With everything ready, you can proceed through the restoration steps with confidence.
Disassembly: Taking the Plane Apart
Disassembly is the first step in restoring a vintage hand plane. Begin by removing the blade assembly, which typically consists of the iron (cutting blade) and the chip breaker (cap iron). Loosen the lever cap screw or cam, depending on the model, and carefully lift out the blade assembly. Next, unscrew the chip breaker from the iron; this may require a screwdriver that fits the screw slot precisely to avoid stripping. Set these parts aside in a safe place. Then, remove the frog, which is the adjustable metal piece that holds the blade assembly. This is usually secured by two screws accessible from the back of the plane. On some models, you may need to remove the handle and knob first. The handle (tote) and front knob are often attached with screws or bolts; unscrew them gently, taking care not to damage the wood if it is fragile. Keep all screws and small parts together, noting their positions for reassembly.
Once the major components are separated, you may find that some parts are stuck due to rust or dried oil. Avoid forcing them, as this can break cast iron or strip threads. Applying a penetrating oil and allowing it to soak can help loosen stubborn screws. If the blade is severely rusted into the plane body, a gentle tap with a mallet on the back of the plane body (not on the blade) may help, but use caution. Document the disassembly process with photos if you are unsure about the order, as this will aid reassembly. After disassembly, you should have a collection of parts: the body, frog, lever cap, blade, chip breaker, handle, knob, and various screws. Each will need cleaning and inspection.
Cleaning and Rust Removal
Cleaning is a critical step to remove dirt, rust, and old grease from all components. Start with the plane body and larger cast iron parts. A wire brush can remove loose rust and grime, but for deeper rust, consider using a chemical rust remover or electrolysis. Citric acid solution is a common and relatively safe method; soak the parts for several hours, then scrub with a wire brush or steel wool. Alternatively, electrolysis using a battery charger and a sacrificial anode can be effective, but it requires more setup and should be done outdoors or in a well-ventilated area. After rust removal, rinse and dry the parts thoroughly to prevent flash rust. Applying a light coat of oil or paste wax can protect the bare metal.
For the blade and chip breaker, avoid using aggressive abrasives that could alter their geometry. Instead, use fine sandpaper or a honing stone to remove rust from the flat surfaces. The bevel side of the blade will be addressed during sharpening. The handle and knob, if wooden, should be cleaned with a mild soap and water solution, then allowed to dry completely. Avoid soaking wood for extended periods, as it can cause swelling or cracking. If the wood is dry or cracked, a light application of boiled linseed oil or furniture wax can help preserve it. For metal screws and small parts, a wire brush or a soak in rust remover followed by a rinse works well. Inspect each part for damage such as cracks, stripped threads, or excessive wear. In some cases, you may need to replace parts, but often cleaning and minor repairs suffice.
After cleaning, evaluate the flatness of the sole (the bottom of the plane). Over time, the sole may become concave or convex, affecting the plane’s performance. You can check flatness by placing a straightedge across the sole and looking for gaps. If the sole is significantly out of flat, you may need to lap it on a flat surface such as a glass plate or granite slab with sandpaper adhered to it. This process involves rubbing the sole on the abrasive until it is flat, which can be time-consuming. However, for many vintage planes, a slight amount of unevenness is acceptable for general woodworking. Focus on removing any high spots that would cause the plane to rock. Similarly, check the sides for squareness if you intend to use the plane for shooting edges. Cleaning and flattening prepare the plane for sharpening and reassembly.
Sharpening the Blade
Sharpening the blade is essential for the plane to cut effectively. The goal is to establish a consistent bevel angle and a sharp edge. Most bench planes use a bevel angle of 25 degrees for the primary bevel, with a secondary micro-bevel of 30 degrees for strength. You can use water stones, oil stones, or diamond plates. Start with a coarse stone (around 1000 grit) to establish the bevel if the blade is dull or damaged. If the blade is in good shape, you may begin with a finer stone (4000-8000 grit). A honing guide can help maintain a consistent angle, especially for beginners. Lubricate the stone with water or oil as recommended. Move the blade back and forth across the stone, maintaining the angle, until a burr forms on the back side of the edge. This burr indicates that the bevel has been ground all the way to the edge.
Once the burr is felt along the entire edge, flip the blade over and remove the burr by laying the flat back on the stone and rubbing it a few times. Then, proceed to finer stones to polish the bevel and refine the edge. A micro-bevel can be created by increasing the angle slightly (e.g., 30 degrees) and taking a few strokes on a fine stone. This strengthens the edge and makes it easier to maintain. After sharpening, the blade should be able to shave hair or slice paper cleanly. Be careful not to over-sharpen, as this can remove too much metal. Sharpen the chip breaker as well; its leading edge should mate perfectly with the blade to prevent shavings from getting stuck. You can hone the chip breaker’s edge on a fine stone, ensuring it is flat and smooth. A well-sharpened blade and chip breaker are crucial for smooth cutting and efficient chip clearance.
After sharpening, clean the blade and chip breaker to remove any metal filings or stone slurry. Dry them thoroughly and apply a light coat of oil to prevent rust. The sharpening process may need to be repeated periodically as you use the plane, but once the initial bevel is set, touch-ups are quick. If you are new to sharpening, practice on a less valuable blade first. Remember that sharpening is a skill that improves with time, and the results directly affect the plane’s performance. With a sharp blade, the plane will cut smoothly and leave a surface ready for finishing.
Reassembly and Adjustment
Reassembly is essentially the reverse of disassembly. Begin by attaching the frog to the plane body. The frog should be positioned so that the blade’s cutting edge will advance properly. On most planes, the frog can be adjusted forward or backward to change the mouth opening; a smaller opening is better for fine work, while a larger opening accommodates thicker shavings. Tighten the frog screws securely but not excessively. Next, attach the chip breaker to the blade. The chip breaker should be set back from the cutting edge by about 1/32 to 1/16 inch (0.8 to 1.6 mm), depending on the desired shaving thickness. For fine work, set it closer; for thicker shavings, set it further back. Tighten the screw firmly. Then, insert the blade assembly into the plane body, ensuring the blade’s edge is centered and the chip breaker is on top. Place the lever cap over the blade assembly and secure it with the lever cap screw or cam. The lever cap should hold the blade assembly firmly in place but allow for adjustment.
After the blade assembly is secured, adjust the depth of cut using the adjustment mechanism. Most planes have a lateral adjustment lever to ensure the blade is square to the mouth, and a depth adjustment wheel or knob to control how far the blade protrudes. Start with the blade retracted and gradually advance it until it just begins to protrude from the sole. Check the lateral alignment by sighting down the sole or taking a test cut on a scrap piece of wood. The blade should protrude evenly across its width. If it is skewed, use the lateral adjustment lever to correct it. The mouth opening should be checked; if it is too wide, you may need to adjust the frog forward. Once adjusted, take a test cut on a piece of wood. The plane should produce a smooth, continuous shaving without chatter. If the shaving is uneven or the plane chatters, readjust the blade depth and lateral alignment. Fine-tuning may take a few attempts, but patience yields a well-performing tool.
Finally, reattach the handle and knob if they were removed. Tighten the screws snugly, but avoid over-tightening, which could crack the wood. If the handle or knob is loose, you can add a small washer or use a thread-locking compound sparingly. Once reassembled, give the plane a final check: ensure all screws are tight, the blade is sharp and properly adjusted, and the sole is clean. Apply a protective coat of paste wax to the sole and other metal surfaces to reduce friction and prevent rust. Your vintage hand plane is now restored and ready for use. With regular maintenance, it will serve you well for many years.