Traditional blacksmithing involves shaping metal through controlled heating and hammering. Among the many items a smith might produce, the hand forged nail represents a foundational project. It requires an understanding of steel behaviour, hammer control, and heat management. The process transforms a simple steel rod into a functional object with a head and a point. This article outlines a methodical approach to forging a nail, focusing on the equipment used and the stages involved.
The tools required are basic: a forge, an anvil, and a hammer. The steel rod, typically mild steel, serves as the starting material. The work proceeds through drawing out, upsetting, shaping, and finishing. Each step depends on the temperature and the condition of the metal. Throughout the process, the smith observes colour changes and adjusts the hammer blows accordingly. The goal is to achieve a consistent form without introducing cracks or weak points.
This guide describes a sequence that can be adapted to different workshop settings. It does not prescribe a single correct method, as variables such as steel composition, fuel type, and ambient conditions influence the work. Instead, it presents a general framework that a smith can refine through practice. The emphasis is on understanding the principles behind each action rather than simply replicating a set of movements.
Understanding the Material and Equipment
The starting point is a steel rod, often 6 to 8 millimetres in diameter. Mild steel is commonly chosen because it is relatively forgiving, but other alloys may be used depending on the intended application. The rod should be clean and free of rust or scale that could mar the final surface. Before heating, the smith inspects the rod for any defects that might propagate during forging.
The forge provides the heat source. A traditional solid-fuel forge, such as one using coal or coke, or a gas forge, can bring the steel to a forging temperature. The optimal range is typically between 900°C and 1,100°C, where the steel becomes plastic and malleable. At this stage, the metal appears a bright orange to yellow colour. Overheating can cause grain growth or burning, so careful observation is necessary.
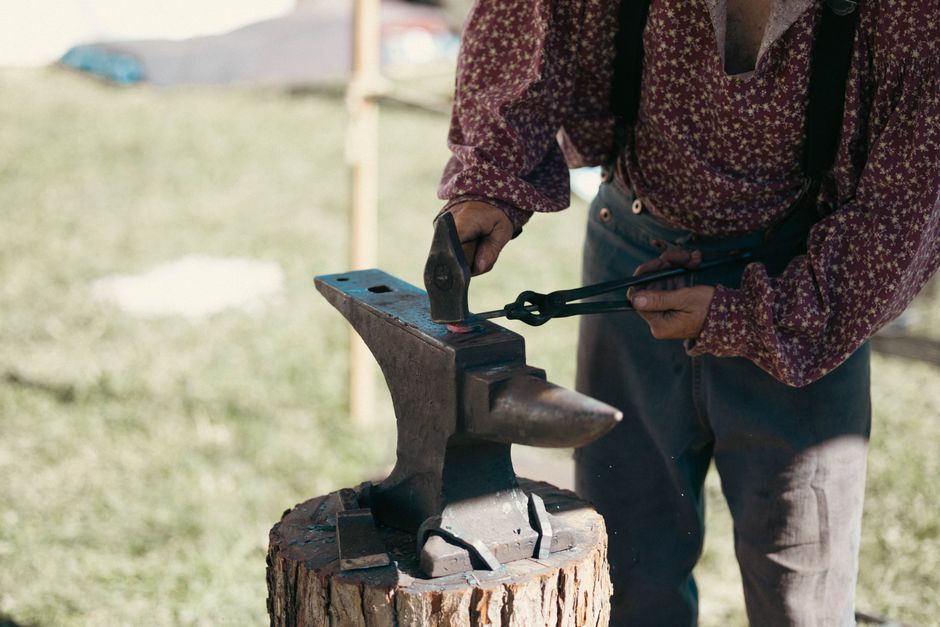
The anvil serves as the work surface. Its face should be smooth but not polished, allowing the hammer to bite without slipping. The horn, hardy hole, and pritchel hole offer additional features for shaping and cutting. The hammer, usually a cross-peen or ball-peen type, is the primary forming tool. A cross-peen hammer is particularly useful for drawing out the metal because its wedge-shaped peen concentrates force.
Other tools that may be helpful include tongs for holding the work, a wire brush for removing scale, and a quenching tank. Safety equipment such as eye protection, gloves, and a leather apron is essential. The workshop should be well-ventilated to manage smoke and fumes. With these basics in place, the smith can begin the forging sequence.
Forging the Nail: Step by Step
The first step is to heat the end of the steel rod. The rod is placed in the forge and brought to a forging temperature. It is important to heat a sufficient length, perhaps 10 to 15 centimetres, to allow for drawing out the shank. Once the steel reaches the desired colour, it is removed from the forge and placed on the anvil. The smith then uses the hammer to taper the end. This is done by striking the metal with the peen of the hammer, working from the tip towards the body of the rod. Each blow should be deliberate, moving the metal incrementally.
Drawing out the point requires multiple heats. As the steel cools, it becomes less workable, so it must be returned to the forge. The smith repeats the process until the taper is about 5 to 7 centimetres long and the tip is narrow enough to form a point. The point itself is often refined by forging over the edge of the anvil or using a Hardy tool. The goal is a gradual taper that will allow the nail to penetrate wood without splitting it excessively.
Next, the head is formed. The rod is cut to length, leaving enough material for the head. The cut end is heated and then upset. Upsetting involves striking the end of the rod against the anvil to thicken it. This is done by holding the rod vertically and hammering the top end. The thickened section is then shaped into a head using a hammer and possibly a heading tool. The head can be domed, flat, or faceted, depending on the desired style.
Throughout forging, the smith must maintain a consistent temperature. If the steel cools below a certain point, it may develop cracks if hammered further. Conversely, if it is too hot, it may crumble or spark. The colour of the steel is a guide: a bright yellow indicates a high forging temperature, while a dull red indicates that it is too cool for heavy deformation. The smith learns to read these cues and adjust accordingly.
Heat Treatment and Finishing
After the nail is shaped, it may undergo heat treatment to adjust its properties. However, not all nails require this. For a common nail, the as-forged condition may be sufficient. If a harder nail is desired, it can be heated to a critical temperature and then quenched in oil or water. This process, known as hardening, increases brittleness, so it is often followed by tempering—reheating to a lower temperature to reduce internal stresses. The choice depends on the intended use and the steel’s alloy content.
Finishing techniques vary. Some smiths leave the nail with a forged finish, which retains a rustic appearance. Others may grind or file the surface to remove scale and smooth imperfections. A wire brush can be used while the nail is still hot to remove loose scale. For a more refined look, the nail can be polished with abrasive papers or buffed. A protective coating, such as oil or wax, may be applied to inhibit rust. The finish should be appropriate for the environment where the nail will be used.
Quality control is an ongoing process. The smith checks the nail for straightness, head integrity, and point sharpness. A well-forged nail has a smooth transition from shank to point and a head that is securely formed. Any cracks or folds indicate a flaw that may compromise strength. By examining each nail, the smith can adjust techniques for future pieces.
Observation of colour and consistency in hammer blows are key to successful forging.
Contextual Considerations and Variations
The method described is a general guide. Variations exist based on regional traditions and individual workshop practices. For instance, some smiths prefer to forge the head first, while others draw the point first. The type of forge and fuel can also influence the number of heats required. In the United Kingdom, traditional blacksmithing often uses coke forges, but gas forges are increasingly common for their convenience.
Steel selection plays a significant role. While mild steel is typical, higher-carbon steels may be used for nails requiring greater hardness. However, these steels are less forgiving and require more careful heat treatment. The smith must consider the application: a nail for exterior use might benefit from a corrosion-resistant alloy or a protective coating. The environment and load-bearing requirements guide these choices.
Safety and environmental factors are important. Forging produces smoke, noise, and sparks, so proper ventilation and protective gear are necessary. The disposal of scale and quenching fluids should follow local regulations. In the UK, waste management guidelines apply to workshop operations. By adhering to these practices, the smith can work safely and responsibly.
Finally, the hand forged nail is a testament to skill and patience. It is not merely a utilitarian object but a piece of craftsmanship. Whether used in restoration work or as a decorative element, it carries the marks of its maker. The process, from steel rod to finished nail, embodies the principles of traditional blacksmithing: control, observation, and respect for the material. Those interested in learning more may seek instruction from experienced smiths or attend courses. Craft & Grain notes that such skills are often passed down through generations, contributing to the rich heritage of metalwork.